
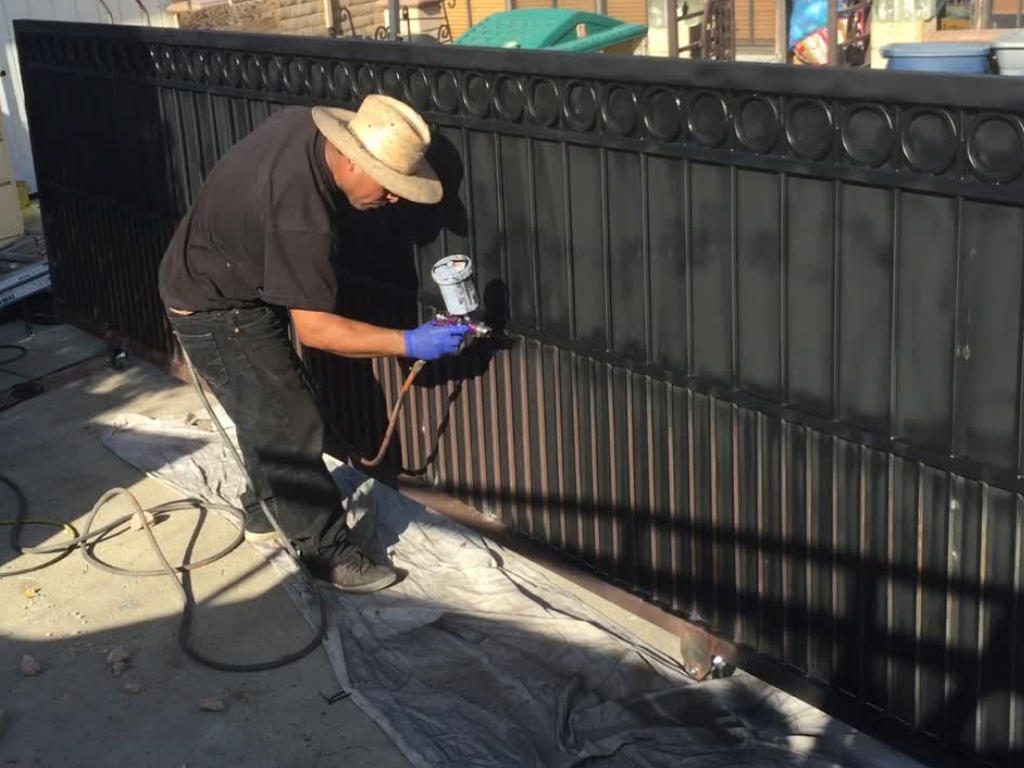
Does your gate look tired, faded, or a little rusty? It’s time to give it a fresh coat of paint. While it may sound like a simple weekend project, painting gates can be more complicated than you’d think, especially when dealing with large or intricate designs. Before you grab a brush and get started, here’s everything you need to know about painting gates, from choosing the right method to achieving a professional finish.
When Should You Paint Your Gate?
Painting your gate is an excellent way to breathe new life into a faded or rusty entrance without the astronomical cost of replacement. For a fraction of the price, you can transform your gate’s appearance and extend its lifespan by several years.
Timing matters when it comes to gate painting. Spring and summer are ideal seasons for this project because the gate needs anywhere from a few hours to a few days to dry completely, depending on its size. Warm, dry weather ensures the paint cures properly, while wind and rain can ruin your hard work, leaving you with an uneven, streaky finish.
However, there’s an important exception to consider. If your gate is severely corroded with rust eating through the metal, painting won’t solve the underlying problem. In these cases, D-One Gate Repair Burbank can assess whether restoration is possible or if replacement is the better option.
Understanding Different Gate Types
Before you start painting, it’s helpful to understand the type of gate you’re working with. Two main categories will affect your painting approach.
The first is a standard metal gate that shows signs of rust, typically reddish-brown. The second is a galvanized gate, which has been coated with an anti-rust material and usually has a silver or grayish appearance. While the painting process is similar for both types, the primer and paint you choose may differ slightly.
Choosing the Right Painting Method
Just as there are many paint colors to choose from, there are several methods for applying that paint to your gate. Each approach has its advantages depending on your gate’s size, location, and condition.
Spray Painting Your Gate
Spray painting uses specialized equipment, such as paint guns or airless sprayers, to apply an even coat of paint quickly and efficiently. This method works beautifully for large gates with plenty of open space around them. The spray creates a smooth, professional finish that’s hard to achieve with other methods.
The main consideration with spray painting is overspray. Paint particles can travel through the air and land on nearby surfaces, so you’ll need to protect everything in the area carefully. If your gate is near your house, cars, or landscaping, you’ll need to do extensive masking and covering before you begin.
Brush and Roller Application
The traditional approach of using brushes and rollers is more suitable for smaller gates or situations where you can’t risk paint overspray. This method gives you precise control over where the paint goes, making it perfect for detailed ironwork or gates located in tight spaces.
The trade-off is that brush-and-roller application typically doesn’t produce as smooth a finish as spray painting. You might notice brush strokes, roller marks, or occasional drips in the final result. To minimize these imperfections, plan to apply multiple thin coats rather than a single thick coat, allowing proper drying time between applications.
The Gate Painting Process
Proper preparation is the key to a long-lasting paint job that looks professional. Rushing through the prep work will only lead to peeling and flaking down the road.
Protecting Your Work Area
Start by thoroughly covering everything around your gate. This step is especially critical if you’re spray painting, but even brush and roller applications can create drips and splatters. Use plastic sheeting secured with painter’s tape to protect walls, driveways, landscaping, and any other surfaces you don’t want painted.
Cleaning and Surface Preparation
Next comes the most important step that many people try to skip: cleaning and preparing the metal surface. Use a damp cloth to remove dirt and grease, then use sandpaper to smooth rough spots and remove loose paint or rust. This process, while tedious, ensures that your new paint bonds properly to the metal and lasts for years rather than months.
Even galvanized gates that appear clean need this attention. The zinc coating on galvanized metal can develop a powdery residue that prevents paint adhesion, so a thorough cleaning and light sanding are essential.
Selecting the Right Paint
Once your gate is clean and smooth, it’s time to apply paint. Metal gates require specialized paints formulated to withstand outdoor conditions and adhere to metal surfaces. Look for exterior metal paints from reputable brands that specifically mention rust resistance.
Many painting projects require a primer coat before the colored finish coat. This base layer helps the top coat stick better and provides additional protection against rust and corrosion. However, some modern paints are formulated as primer-and-paint combinations, allowing you to paint directly over rust or galvanized surfaces without a separate primer step.
For gates that take a beating from the elements or heavy use, consider investing in epoxy-based paints. These premium options provide superior durability and a beautiful finish that resists chipping, fading, and corrosion. While they cost roughly twice as much as standard metal paints, the extended lifespan and reduced maintenance often justify the investment.
Achieving Professional Results
With the right preparation, materials, and technique, painting your gate can transform your property’s appearance and protect your investment for years to come. Take your time with each step, don’t cut corners on preparation, and you’ll end up with results that rival a professional paint job.