
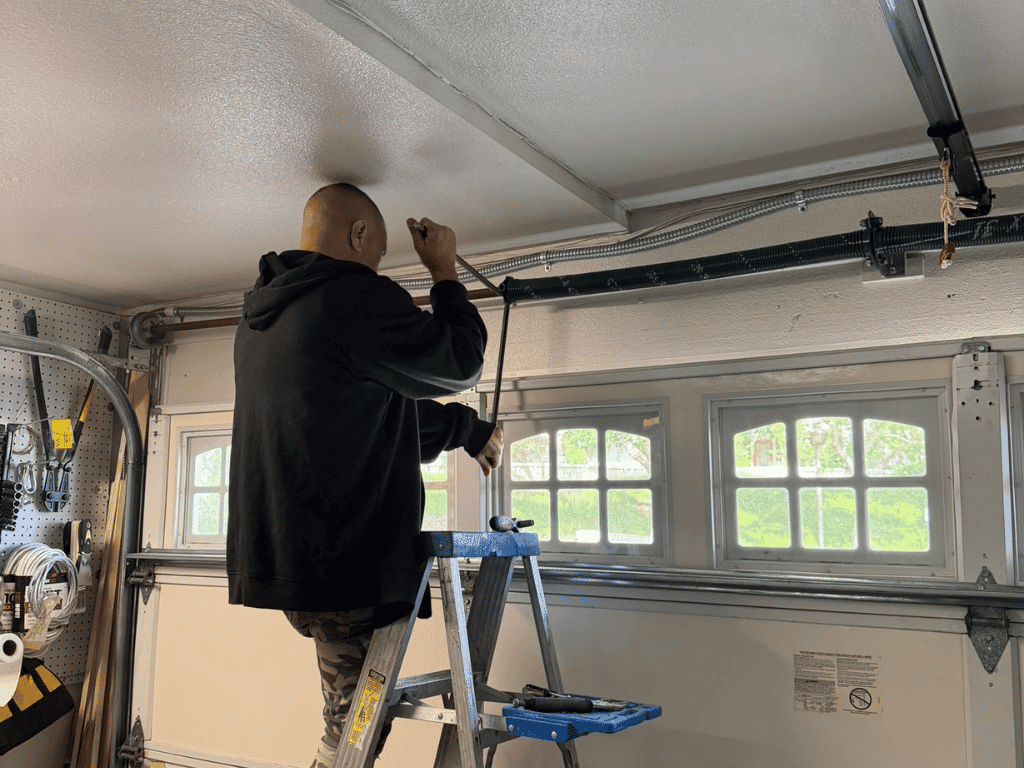
Selection, Sizing, Tools, and Safety Protocols for Property Owners
Garage door springs act as the mechanical muscles of your entire garage door system. Their primary role is to counterbalance the immense weight of the door, allowing it to open and close smoothly-whether operated manually or via an automatic opener motor. While many homeowners contemplate replacing these components themselves when they break, garage door spring replacement is widely recognized as one of the most complex and inherently dangerous home maintenance tasks. This comprehensive guide provides a structured breakdown of spring types, sizing parameters, essential tools, and precise operational procedures to educate consumers and ensure optimal safety.
- CRITICAL SAFETY WARNING (1): RISK OF LETHAL INJURY
Garage door springs operate under extreme, tightly wound tension. An incorrect movement, improper tool selection, or lack of experience can cause the spring to instantly release its stored energy with explosive force. This can lead to catastrophic consequences, including severe lacerations, bone fractures, finger amputations, or fatal injuries. If you lack the formal training, physical capacity, or exact specialized tools required for this project, do not attempt it. Contact a licensed, professional garage door technician in Burbank immediately.
Our Company: D-One Garage Doors And Gates
1. Understanding Spring Categories and Technical Specifications
In residential and commercial garage door architectures, two primary spring systems are utilized. Selecting the correct specification is non-negotiable, as an improperly paired spring will overstrain the opener motor or cause the door to crash.
Category A: Extension Springs
Extension springs are mounted horizontally above the horizontal tracks on both sides of the garage door. They function by stretching linearly as the door closes and contracting as it opens. Because these springs stretch under immense tension, they must always be equipped with heavy-duty safety cables running through their center. Without safety cables, a snapping extension spring turns into a lethal projectile capable of piercing walls, vehicles, or anyone standing nearby.
For standard 7-foot tall residential doors, extension springs are standardized internationally by the DASMA (Door & Access Systems Manufacturers Association) color code system. This system identifies the specific weight capacity (in pounds) that the spring is designed to lift:
|
DASMA Color Code
|
Pull Weight Capacity (lbs)
|
Typical Garage Door Match
|
|---|---|---|
|
White
|
110 lbs
|
Single-car door (8x7 or 9x7), ultra-lightweight uninsulated steel
|
|
Green
|
120 lbs
|
Single-car door, standard uninsulated steel
|
|
Yellow
|
130 lbs
|
Single-car door, lightly insulated steel panel
|
|
Blue
|
140 lbs
|
Single-car door, medium-to-heavy insulated steel
|
|
Red
|
150 lbs
|
Single-car heavy solid wood door / Double-car (16x7) light uninsulated steel
|
|
Brown
|
160 lbs
|
Double-car door (16x7), standard uninsulated steel
|
|
Orange
|
170 lbs
|
Double-car door, steel with light insulation
|
|
Gold
|
180 lbs
|
Double-car door, medium insulated sandwich steel steel
|
|
Light Blue
|
190 lbs
|
Double-car door, heavy multi-layer insulated steel / overlay door
|
Category B: Torsion Springs
Torsion springs are the industry standard for modern, heavy, or high-cycle garage doors in Burbank. They are mounted horizontally on a steel torsion tube directly above the header of the garage door opening. Instead of stretching, they operate using torque (rotational twisting force). When the door closes, the cables wrap around drums, winding the spring and storing energy. When the door opens, the spring unwinds, releasing the energy to lift the door.
Unlike extension springs, torsion springs are highly customized and require precise mechanical calculations involving three distinct parameters: Wire Gauge (thickness of the wire), Inside Diameter (ID), and overall Length. The table below outlines the most common configurations found in standard residential setups alongside estimated lift ratings:
|
Wire Gauge (Inches)
|
Standard Length (Inches)
|
Estimated Lift Rating
|
Typical Garage Door Match
|
|---|---|---|---|
|
0.207
|
20" - 24"
|
80 - 100 lbs
|
Single-car door (8x7), entry-level lightweight steel
|
|
0.218
|
24" - 28"
|
100 - 130 lbs
|
Single-car door (9x7), uninsulated or light-gauge steel
|
|
0.225
|
28" - 32"
|
130 - 150 lbs
|
Single-car heavy steel / Double-car (16x7) ultra-light steel
|
|
0.234
|
30" - 35"
|
150 - 180 lbs
|
Double-car door (16x7), standard uninsulated steel
|
|
0.243
|
32" - 38"
|
180 - 220 lbs
|
Double-car door (16x7), standard insulated sandwich steel
|
|
0.250
|
33" - 40"
|
220 - 260 lbs
|
Double-car door, heavy high-R-value insulation or composite overlay
|
|
0.262 and up
|
35" - 45"+
|
260+ lbs
|
Premium custom wood doors, full-view glass/aluminum, or commercial applications
|
2. Winding Orientation and Color Coding: Left vs. Right
A fundamental and frequently misunderstood aspect of torsion springs is winding orientation. Torsion springs are manufactured as either Right-Hand Wound (RHW) or Left-Hand Wound (LHW). Installing a spring on the wrong side will cause the coils to uncoil and binding to occur, rendering the system non-functional and highly hazardous.
To eliminate errors, the garage door industry uses a standardized color-coding system on the winding cones. The strict operational rule for determining orientation is always established by standing INSIDE THE GARAGE, LOOKING OUT toward the door:
- RED Winding Cone (Right-Hand Wound Spring): This spring must always be installed on the LEFT side of the center bearing plate.
- BLACK Winding Cone (Left-Hand Wound Spring): This spring must always be installed on the RIGHT side of the center bearing plate.
- CRITICAL SAFETY WARNING (2): THE DANGER OF IMPROVISED TOOLS
Under no circumstances should you ever use improvised items such as screwdrivers, crowbars, rebar, or socket extensions to unwind or wind a torsion spring. Improvised tools do not match the exact tolerances of the winding cone holes. Under the intense pressure of the spring, an improvised tool can instantly bend, slip, or violently snap, launching metal shards or causing the spring to unwind uncontrollably, striking the operator with bone-shattering force.
Want to know more click: Garage door spring repair
3. Essential Professional Tool Requirements
Executing a successful and secure spring replacement requires specific, industrial-grade tools. Before beginning, ensure the following checklist is completely fulfilled:
- Professional Winding Bars:
Two solid, high-tensile carbon steel rods (typically 18 inches long, with a precise 1/2″ or 5/8″ diameter) designed explicitly to lock into the winding cone. These are the only authorized tools for adjusting torsion tension.
- Two Pairs of Locking Pliers (Vise-Grips):
Heavy-duty locking pliers are mandatory for safety immobilization. One pair is clamped onto the torsion shaft to prevent rotation during assembly, and the second pair is clamped onto the vertical track immediately above a roller to prevent the door from flying upward or falling down.
- Standard Wrench and Socket Set:
Industrial wrenches (specifically 7/16″, 1/2″, and 9/16″ sizes) are required to securely loosen and tighten the square-head set screws on the winding cones and the structural bolts on the center bearing bracket.
- Heavy-Duty A-Frame Step Ladder:
A highly stable, commercial-grade ladder positioned safely to allow the technician to work directly in front of the torsion shaft assembly without overreaching.
- Personal Protective Equipment (PPE):
Industrial wrap-around safety goggles are mandatory to guard against snapping cables or flying metal components. Heavy-duty leather work gloves must be worn to protect hands from pinching coils and sharp steel edges.
- Industrial Tape Measure & Wire Gauge:
Required to precisely determine the existing spring’s length, inside diameter, and wire thickness before ordering the exact replacement components.
- Chalk or Permanent Marker:
Used to draw a clear, straight horizontal line across the length of the unwound new spring. As the spring is wound, this line breaks into a spiral pattern, allowing the installer to count the exact number of applied turns.
4. Step-by-Step Torsion Spring Replacement Procedure
This section outlines the industrial sequence of operations required to safely replace broken torsion springs. Every step must be executed with extreme caution and focused attention.
Step 1: System Isolation and Power Disconnection
Disconnect the automatic garage door opener from the power source to eliminate any risk of accidental activation. Manually lower the garage door completely to the floor. Securely clamp a pair of locking pliers onto the vertical track right above the lowest roller to guarantee the door cannot move under any circumstance.
Step 2: Unwinding the Unbroken Spring (The Highest-Risk Phase)
If only one spring is broken, the remaining spring still contains massive, latent energy that must be released. Insert a professional winding bar fully into the winding cone hole. Holding the bar with a firm, two-handed grip, loosen the square-head set screws. Carefully unwind the spring quarter-turn by quarter-turn, always using the second winding bar alternatively to catch and control the rotational force. Never stand directly in line with the winding bars.
Step 3: Component Disassembly and Removal
Loosen the center bracket bolts holding the stationary cones together. Slide the entire steel torsion shaft horizontally to the left or right to allow the removal of the old springs, cable drums, and lift cables. Inspect the bearings and cables for wear or fraying, and replace them if structural integrity is compromised.
Step 4: Mounting the New Springs
Slide the brand-new torsion springs onto the shaft, ensuring strict adherence to the color-coding rules (RED cone spring on the left side, BLACK cone spring on the right side of the center bracket). Reinstall the cable drums and bolt the stationary cones tightly back into the center bearing plate.
Step 5: Winding the New Springs to Specification
Draw a straight horizontal line along the length of the unwound spring using chalk or a marker. Insert the winding bars and begin winding the spring upward (in the direction the cables go over the drum). The standard calculation for a 7-foot tall door is 30 to 32 quarter-turns (equivalent to 7.5 to 8 full rotations). Use the spiraling chalk line to count the turns perfectly. Once achieved, tighten the square-head set screws securely onto the shaft, then carefully remove the winding bars.
5. Post-Installation Safety, Balance, and Performance Testing
After the installation is complete, the job is not done. You must execute rigorous quality control and safety checks BEFORE re-engaging the automatic garage door opener. Failure to do so can burn out the opener motor or cause the door to derail.
- The Manual Balance Test:
This is the definitive test of a successful installation. With the automatic opener still completely disconnected, manually lift the garage door approximately halfway up (3 to 4 feet off the ground) and gently release your hands. A perfectly balanced system will cause the door to hover completely stationary, held entirely by the counterbalancing force of the new springs. If the door drifts downward or slams shut, the springs are underwound or under-specified. If the door flies violently upward, the springs are overwound or too strong.
- Manual Operation Smoothness Check:
Manually open and close the door fully multiple times. The movement should feel exceptionally smooth, fluid, and effortless. Listen closely for any binding, unusual grinding, friction, or loud metal-on-metal noises along the track.
- Cable and Drum Alignment Inspection:
Examine the lift cables on both sides of the door. Ensure they are seated tightly, flush, and uniformly within the grooves of the cable drums. Loose or uneven cables will cause the door to lift crookedly, resulting in a dangerous jam.
- The Automatic Safety Reversal Test:
Re-engage the automatic garage door opener and restore power. Place a solid object, such as a 2×4 piece of wood, flat on the ground directly in the path of the center of the door. Activate the door to close. Upon striking the wood block, the door must instantly detect the obstruction and reverse direction back to the fully open position. If it forces its way down, the opener’s limits and force margins must be calibrated.
- Friction Reduction and Lubrication:
As a final preventive maintenance measure, spray a generous layer of high-grade, professional silicone-based or white lithium garage door lubricant across the entire length of the new springs. This minimizes inner coil friction, prevents oxidation/rust, and eliminates loud squeaking sounds during daily cycles.
Conclusion
Understanding the mechanics, weight ratings, sizing parameters, and rigorous installation steps of garage door springs empowers property owners to make informed, intelligent decisions regarding their home infrastructure. A well-balanced door ensures the longevity of your entire garage system, protecting expensive automatic openers from premature failure.
- FINAL ACCIDENT PREVENTION REMINDER
If at any stage of reviewing this document you feel uncertain, lack the physical grip strength, or do not possess the exact professional-grade tools required-do not risk your safety. Garage door components can cause irreversible physical injury in a split second. Hiring an experienced, certified garage door technician ensures that your repair is completed safely, swiftly, and backed by a professional warranty.
Need help from a professional company? Call us: D-One Garage Doors & Gates